Hello everyone, and welcome back to another episode about Light vn! In the past few episodes, we explored some of the basic commands. Today, we're diving deeper with a beginner tutorial to get you started using the engine.
Let's jump right in!
Download & Install Light.vn
To download Light.vn, I recommend downloading it from Itch.io, as it will already be set to English (you won’t have to go to the settings to change the language)
After downloading, unzip the file. You'll see several folders within.
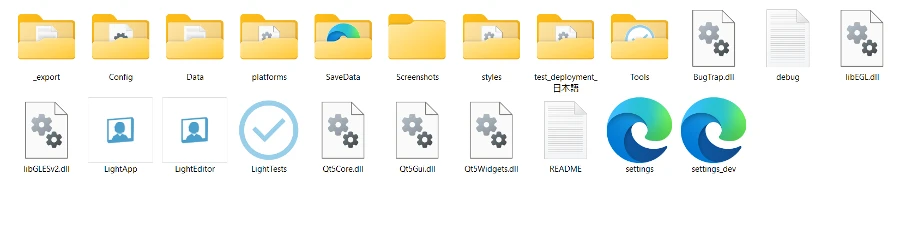
You can preview your game with "LightApp" but to edit the game, you will need "LightEditor"
Other Folders:
- _export: A folder containing output data
- Config: A folder containing settings for commands and other configurations
- Data: A folder for various assets
- platforms: A folder that handles the editor's operation on Windows
- SaveData: A folder where save data is created / stored
- Screenshots: A folder for screenshots
- styles: A folder that handles the editor's styles on Windows
Before we getting start with LightEditor let take some time and know a little bit more about the folders ~
As a normal game creator you only need to focus on the folder "Data"

- BGM: A folder for background music data (you can only play music that is stored in this folder)
- Fonts: A folder for fonts (you will only be able to use fonts stored in this folder)
- Images: A folder for image data (you can only use images inside this folder)
- Maps: A folder for map data
- Models: A folder for 3D models
- Movies: A folder for video data
- Patch: A folder for assets used when creating patches
- Plugins: A folder for plugins
- Scripts: A folder for scripts and scenarios
- SFX: A folder for sound effects
- Shaders: A folder for special effects
- Voices: A folder for voice data
Just a quick note: Some assets need to be placed in specific folders for them to work correctly.
Now, let's double-click to open LightEditor. While you can use Visual Studio Code for coding, I recommend using light vn's Editor "LightEditor" to start.
LightEditor: Interface
Now let's get to know the Light vn editor a little better. I'll divide the Light vn editor "LightEditor" into the following parts:
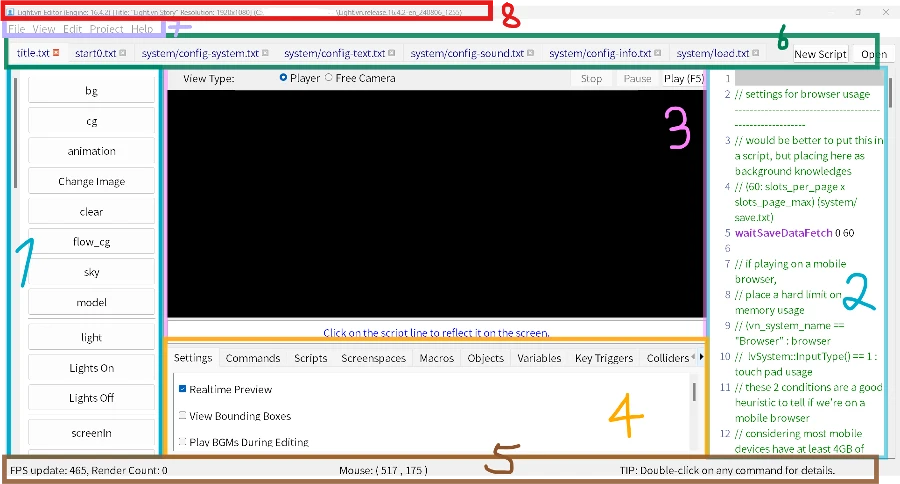
As you can see above, the editor has different areas, each with its own purpose. Let's start with the left-side panel.
1. Using Buttons to Add Script
You can use the panel or buttons on the left side to add scripts to the right side. Typically, clicking a button brings up a pop-up window.
For example:
- If you click 「cg」 (image), a window with your "images" folder opens, allowing you to select an image to display. You can also directly specify where the image should locate on the screen
- If you click 「text」, a window with your "fonts" folder appears. You can then choose the desired font and its location on the screen.
There are several buttons on the left side that let you add commands:
- bg: Adds a background image
- cg: Adds a character sprite or other image
- animation: Shows an animation
- Change Image: Changes a character's expression or background image
- clear: Removes all previous resources from the screen. You can also specify which resources to remove
After starting to write this, I realized there are too many buttons to cover in one post. I'll explain them in more detail later in another post.
You just need to remember: while many commands can be added using the buttons, some actions require typing specific commands directly into the script. For example, resizing an image needs the "zoom" command, and moving an image requires the "move" command and they are not in the list. There are other commands like these as well. I'll cover these in more detail in a separate post.
2. Script
On the right side of the screen, you'll see a text file where you can write your script. With "Realtime Preview" enabled (which is the default), clicking a line of code will instantly show the change / code in the middle screen.
If you press the "Play" button, It starts the story from the line where your cursor clicked.
Also, you can easily copy and paste code within the right panel.
If you double-click a command in the "Commands" section, LightEditor will display its explanation in the bottom right corner.
Also, you can enable word wrapping for text that extends beyond the screen, just go to the "Settings" section and check "Script Word Warp." This is off by default, but I personally prefer it.
You can also use Visual Studio Code to write your script. After saving your changes, Light vn will prompt this message:
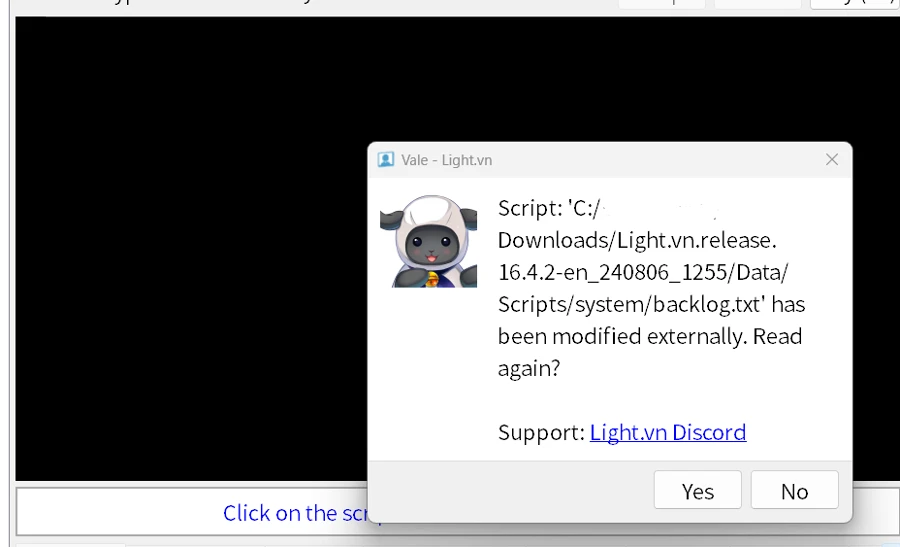
After clicking "Yes," your changes made in the other text editor will be synchronized with LightEditor.
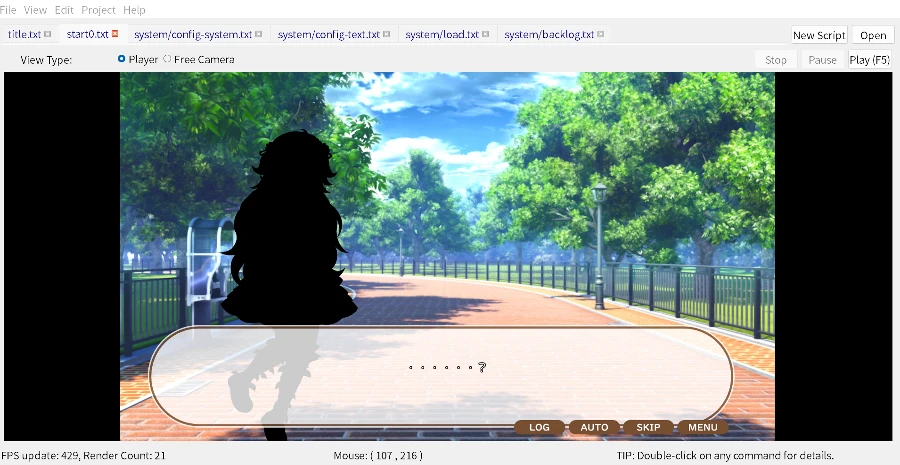
3. Preview Your Game
The middle screen lets you preview your game and see your changes in real time. You can freely resize this screen to get a better view of your game.
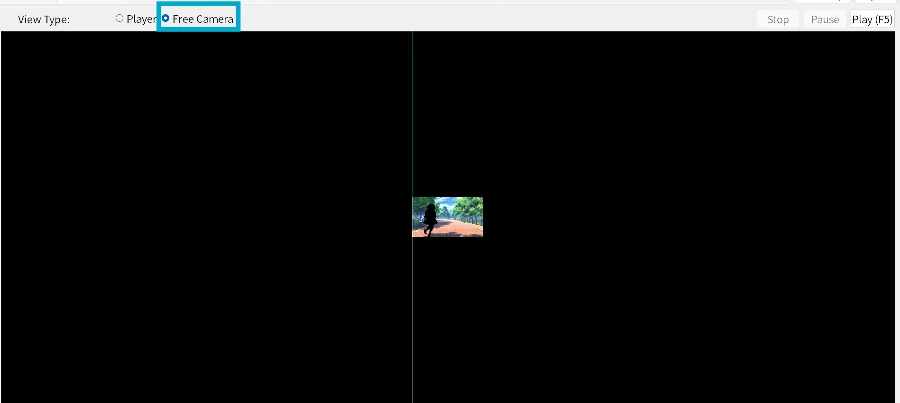
Also, in light vn's editor you have 2 options to preview the game
- Player or
- Free Camera
With Player mode, the screen will be fixed in size.
With Free Camera mode, you can scroll up or down with the mouse to change the screen size, like this:
There are also other settings you can adjust to control what's displayed on the preview screen.
You can try them under "Settings" panel!
4. Editor Function Tab

It is located directly below the preview screen. These tabs allow you to configure and modify certain aspects of the editor. Additionally, you can view engine operations and some other information.
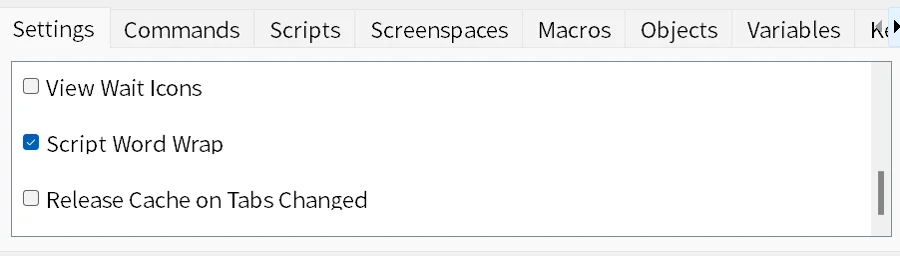
Settings
- Real-time preview: Enables real-time preview
- View Bounding boxes: Displays a bounding box around each object, indicating its area
- Play BGMs During Editing: Plays the background music, background voice, and sound effects that are playing at the current cursor line
- View Axes: In 3D camera mode, displays lines representing the coordinate system in the preview area. The lighter color indicates the positive direction, and the darker color indicates the negative direction (x-axis: pink-red, y-axis: yellow-green-green, z-axis: purple-blue)
- View Mask: Clearly indicates the image material used for the mask
- View Colliders: Displays a bounding box indicating the area for detecting contact and overlap
- View Wait Icons: Displays the character window waiting image and its behavior (you will be able to see the CTC icon, when it is enabled)
- Script Word Wrap: Enables word wrap in the script area (a function that wraps words so that they are not cut off in the middle of the area)
- Release Cache On Tabs Changed: When changing the edited script in the script tab, it releases the asset data temporarily stored in memory (/ It releases prior cache)
Commands
- Displays all commands and their descriptions. If a command matching the selected text in the script area is found, the description of that command is automatically displayed
- Also the link to the official wiki will be attached
- Sometimes, they will also add some examples in the description
Scripts
- Displays the script name
- read line, and status currently being read or waiting
- along with the script number (ID)
- If a function is used in the script, the values will also displayed
Screen area
- Displays the currently constructed screen areas along with their hierarchy
Macros
- Displays the conversion target and conversion result of normal macros and command macros
- If a command macro matching the text selected in the script area is found, this tab is automatically displayed.
- Macros can be disabled by setting macroApply to false and re-enabled by setting it to true
Objects
- Displays the object name, coordinates (x position, y position), and belonging screen area name of currently set objects
- Invisible objects will also be displayed here if they have not exited
- You can also use "Search" function to find a specific object
Variables
- Displays the variable name, variable value, and type of currently set variables
- It will change in real time during the live preview
Key triggers
- Displays settings for key input
- e.g. Scrolling the mouse wheel up displays the history/backlog screen, while scrolling down closes it and continues the story.
Colliders
- Displays the currently set physical processing
Free camera
- Displays the camera position and rotation angle of the viewing direction in the editor's free camera perspective
- It also allows you to change the speed during operation (set by "speed") and input a batch command to move to the free camera position ("Free Camera Apply").
Log
- Displays the editor's operation log
5. Information Bar
Located at the bottom of the window, this bar displays real-time information such as the editor's FPS (frames per second), the number of draw calls in the currently edited script, and the cursor coordinates (mouse position)
6. Script Tab
Located directly below the menu bar, this area displays the scripts you are editing in the editor. Even script files that are not displayed in the script tab will be output if they are stored in the "Scripts" folder (Inside "Data" folder).
If you want to remove a script because its too many above: just click the "x" mark on the script tab
Then, there are two buttons on the right side of the area.
- New Script: Creates a new script file and adds it to the script tab.
- Open: Adds a script file from the "Scripts" folder to the script tab and displays it in the script area
7. Menu Bar
Located at the top of the window
File
- New Project: Creates a new project folder. Since the new folder does not contain any asset files, you need to prepare your own assets
- Save Current Project: Overwrites the script displayed in the script area
- Shortcut key in light vn for this function: CTRL+S
- Close Project: Closes the editor
- A dialog will appear before closing
- Shortcut key in light vn for this function: ALT+F4
View
- Preview Scale: Changes the size of the preview area on the editor
- You can select from
- "50%",
- "75%",
- "100%",
- or "150%" of the set novel resolution
Edit
- Find/Replace: Searches for and replaces words in the script
- Shortcut key in light vn for this function: CTRL+F
Project
- Start/End Test Play from Current Line: Starts or stops to test the script displayed in the script area.
- If there is a cursor line on the script, the test play will start from the next line. Since the script file itself is referenced for operation, changes that have not been overwritten in the script area will not be reflected in the test play.
- Also, new changes in the script area will not be reflected during test play. They will be reflected as preview results when the test play ends
- Settings: Configures settings for the project or launcher (LightEditor) and changes the file used in the editor
- Publish: Creates a new folder and outputs / exports the light vn project (You can choose the export platform and destination.)
- In light vn, you can export to Windows, IOS, Android, Browser, etc.
Help
- User Wiki: Links to the top page of the user wiki
- Tutorial Channel: Links to this YouTube channel -> Light.vn解説チャンネル【非公式】
- Support: Links to this page
- Light.vn HP: Links to this page
8. Topbar
At the very top of the LightEditor, you'll see the light vn engine version you're using (for example, "Engine 16.4.2").
You can also see the title of your project, which can be changed under "Project" > "Settings."
The resolution you've set for the project is displayed there as well and can be modified in the "Project" > "Settings"
Create new project
I personally recommend starting with a sample project and customizing it to your needs. A new project is empty, so you'll have to build all screens from scratch.
To create a new light vn project, go to "File" in the top left corner and click "New Project."
Here are some settings you might want to adjust:
- Resolution: "Project" > "Settings" > "Resolution"
- Start script: "Project" > "Settings" > "Start Script"
- Project name: "Project" > "Settings" > "Title"
After creating a new project, you might want to import some assets to the project, such as fonts, images or audio files.
Light vn: Supported File Formats
The file formats that can be used in Light vn are as follows:
Text Data
- Always use "UTF-8" for the script character code
- txt (character code: UTF-8)
Image Data
- jpg, jpe, jpeg
- png
- tga
3D Model
- glb
Music Data
- ogg
- wav
- mp3
- flac
Video Data
- mpg
Lua file
- 5.3.2
FAQ
What's the difference between LightApp and LightEditor?
If you unzip the Light vn zip file, you'll find some .exe files. You might wonder which one to open to start the launcher, so:
LightApp: This lets you preview your game in its playable state.
LightEditor: This is the tool you'll use to edit and create your game
Can I use Visual Studio for Light vn?
Yes, you can use Visual Studio for light vn and if you prefer coding in Visual Studio, I recommend installing the Txt Syntax extension for better code highlighting.
What image formats does Light.vn support?
- jpg, jpe, jpeg
- png
- tga
I've written other light vn tutorial that you might be interested so feel free to check them out: